
So you want to DIY your own tie-dyed clothes, bedding, or fabric? Brilliant! My How to Tie-Dye Like a Pro guide walks you through all the steps you need to learn how to tie-dye your own beautiful patterns.
This post will give you 10 easy tie-dye patterns for beginners so you can plan your first dye session, and know you’re going to get GREAT results.
View the rest of the guide here:
- Choosing the best dye for tie-dye
- Essential tie-dye supplies
- Choosing the best fabric for tie-dye
- 11 easy tie-dye patterns for beginners (right here!)
- Mixing and applying dye (coming soon)
- How to rinse and wash tie-dye
Want to get email notifications of new posts and videos? Sign up to join the Dye Society!
OK, let’s go through the easy tie-dye patterns!
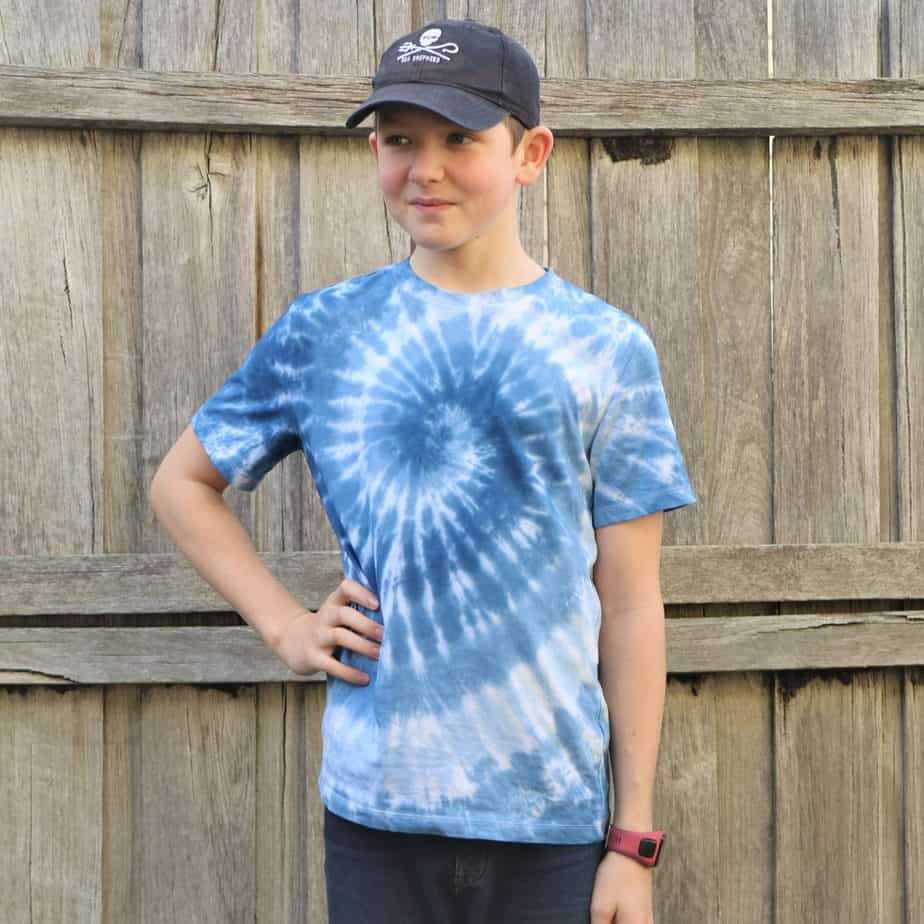
1. Simple crumple tie-dye pattern
The crumple, or scrunch tie-dye, would have to be the EASIEST tie-dye pattern for beginners.
I mean, look – here are two that my 12-year-old son did all by himself.
But that doesn’t mean there are no tricks to make your crumple dyes look great – there are definitely ways to make them crisper and clearer, and really play with the colours and patterns.
Check out Mr Tie-Dye’s amazing tutorial to really master the crumple technique.
2. Galaxy tie-dye pattern
Galaxies are fantastic because they’re much easier than they look.
They’re essentially a crumple tie-dye, but you crumple along a central line.
Then you apply the lightest dye along the central line, and work out to darker colours.
This galaxy tie-dyed towel is an easy example to follow.
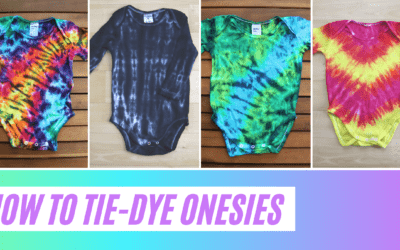
And if you want more colour ideas, take a look at these galaxy tie-dyed onesies.
3. Tie-dyed bullseye
Bullseyes are a great way to start experiment with tying designs.
You don’t need anything fancy, rubber bands will do the trick.
Pro tip – don’t position the bullseye on a breast. Or the centre of a belly. Unless you REALLY want to emphasise those features!
4. Tie-dye spiral technique
Oh, you want to make a tie-dyed spiral, right? Everyone wants to make a tie-dyes spiral because they’re AWESOME!
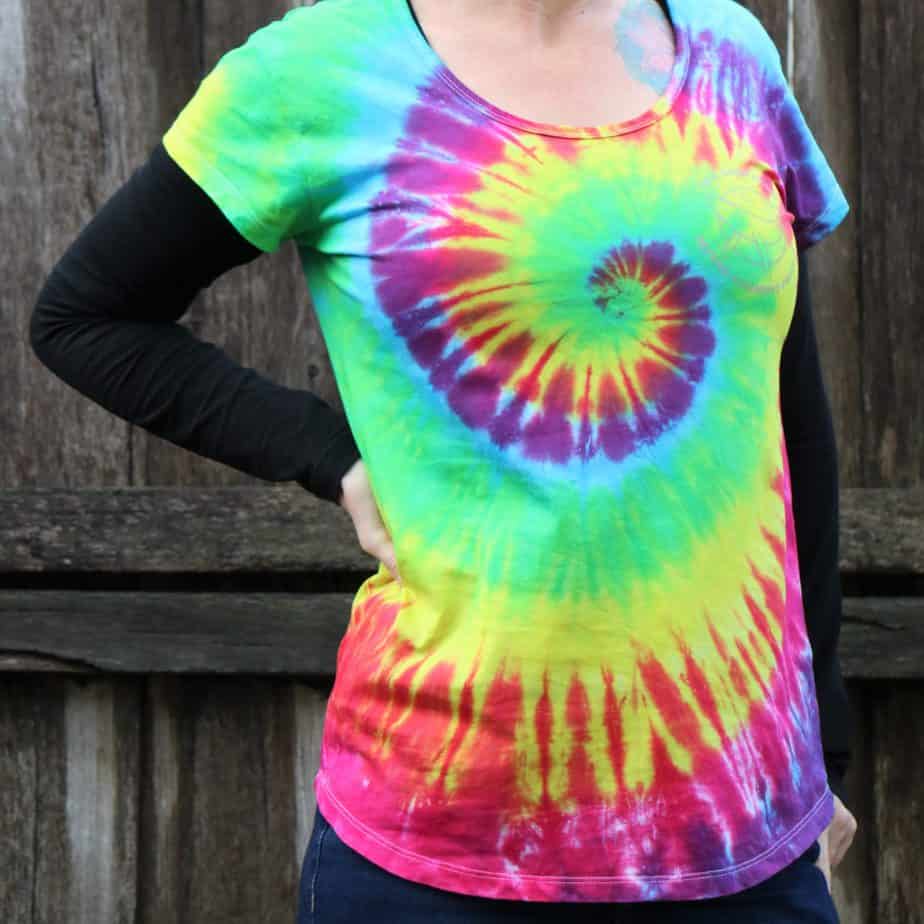
And surprisingly easy.
Really – if this is the first dye pattern you want to attempt, go for it!
I have an entire guide about how to tie-dye spirals, so head over, check it out, and follow the instructions for great spiral patterns.
5. Easiest tie-dye stripes pattern
Tie-dyed stripes are another easy pattern to start with.
Check out these clear instructions for rainbow stripes.
Towels are really easy to fold into stripes because the fabric holds its shape well.
And for a really interesting effect, try putting different colours of dye on each stripe. The folding here is amazingly precise!
6. Spider tie-dye pattern
Spiders are really just a fancy spiral – fold your shirt in half and spiral from the fold before applying dye.
But the effects are very cool.
7. Tie-dye circles
Dyeing small circles with dye is pretty easy – you just band off small circular sections.
If you use something like marbles to form your circles, it’s even easier.
And if you’d like fancier circles, try wrapping string or sinew in wider bands. Guess what, you’ve just taken the first step towards dyeing geodes!
8. Cheat’s shibori arashi
I thought shibori arashi (pole wrapping) would be hard.
All the intricate patterns, the fact that it’s been around for over a thousand years….
Then I tried it and was surprised at how easy it is!
You’ll need a pole or pipe and some string – the only trick is to wrap and scrunch REALLY TIGHTLY.
9. Fan-fold tie-dye pattern
The fan fold is a slightly harder version of stripes, but still doable for a beginner.
Instead of your stripes being an even width the whole way across, they radiate out from a point.
Usually this point is on the side of a shirt, like the one below.
The shoulder is also a great place to start your folds.
You don’t need to put black over the top, of course – you can just have the colours if you prefer.
10. Tie-dyed V pattern
V patterns are just stripes, on an angle, when your fabric is folded in half.
I could only find an ice-dyed V pattern tutorial – but if you’re liquid dyeing simply apply your dye in the same perpendicular stripes.
Pro tip – make sure you get good dye saturation.
Yes, my very first V pattern was great on the back, and barely evident on the front…
11. Ombre tie-dye pattern
Ombre dyeing is actually REALLY DIFFICULT to get right.
It’s typically done by dipping the fabric in a dye bath. The lighter parts spend less time in the dye, and the darker parts spend more time, creating a gradient effect.
Or it can be done by painting the dye on flat fabric.
But with both methods it’s really difficult to avoid hard lines between the shades of colour.
If you’re a beginner, I’d recommend starting like this – with a single bottle of dye that you dilute more and more.
LSD Tie-Dye TV also has a great tutorial with the same method of diluting dye.
YOUR NEXT STEP
OK, you’ve now chosen your dyes, you’ve got your essential tie-dye supplies, you’ve chosen your fabric, AND you’ve planned your first easy tie-dye patterns. Progress!
Now it’s time to prepare your dye area and mix your dye (coming soon) and START DYEING!
Have fun! If you need to know anything else about how to tie-dye please just ask and I’ll update the instructions.
I’d LOVE to see what you create with these tutorials. Please tag @dyediyhq on Facebook or Instagram and I’ll check it out, comment, and share.

0 Comments